Bluescape’s document editor allows users create and edit documents, presentations, and spreadsheets right from within a Bluescape workspace - no integrations required.

Creating a new document
To add a document to the Workspace:
-
Click the
 (Add content) button from the workspace toolbar
 -
Select the type of document you would like to create - Document, Presentation, or Spreadsheet
-
The document will automatically load in Edit mode:
Changes made in the document are automatically saved.
BluePro Tip: Other workspace users with Edit permissions can co-edit the document with you. Other users will be indicated in the Users area in the top-right corner of the editor.
To update the filename, double-click the title in the top-left corner of the editor. -
To exit the document editor, use the “X” located in the top-right corner of the editor window.
Editing an existing document
The document editor allows users to edit previously created or uploaded supported documents (.docx, .pptx, or .xlsx).
- Select an existing document in the workspace and note the options on the toolbar:
| Option | Description |
|---|---|
| Open the document in view mode | |
| Open the document in edit mode | |
| Extract the pages from the document | |
| Download the document |
- Select the
 (edit) button from the toolbar to open the document in edit mode
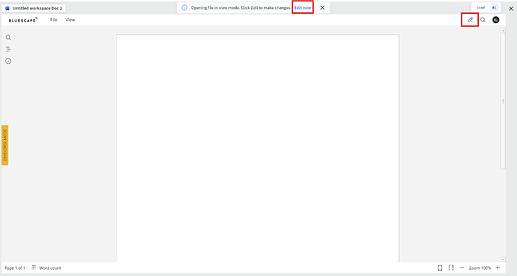
BluePro Tip: When opening the document in view mode, you can switch to edit mode from the notification or from the mode selector in the top-right corner of the document viewer:


